Wednesday, August 31, 2005
Joma's block
Link
When I know that it has arrived,I'll post a pic.
On another note: Can anyone "out there" give me ideas on "how to" lay sequins successfully............I want to use them as bug wings and I'm not being too successful at getting the right oval shape.
I'd like to overlap them a little....but,HOW do I achieve it??
Pinup??
Hope??
HELP
Tuesday, August 30, 2005
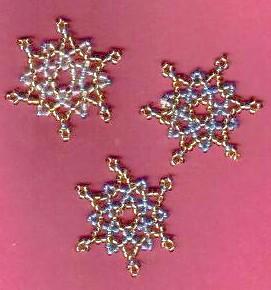
Beaded Snowflake ( Instructions - courtesy of Linda Barraclough )![]() Use gold and light blue seed beads (Olaf #9 or any others as long as they are good, even beads)
Use gold and light blue seed beads (Olaf #9 or any others as long as they are good, even beads)
Thread a fine needle ( you may use a beading needle) with both ends of a long ( 1.2m) thread of white machine cotton ( or for extra strength use Nymo beading thread) so that there is a loop at the end.
Row 1
Pick up 1 gold bead, take it almost to the loop and then put the needle through the loop and tighten, so the bead is held securely ( note: if the threads slip apart the bead will come straight off )
Pick up 11 more gold beads, then go back through the first bead and the next bead so that it forms a tiny ring.
After this your needle should always go in the same direction - usually you will be working from right to left.
Row 2
Pick up 3 light blue beads, miss 1 gold bead and go through the next gold bead. This forms a loop, with 1 gold bead in the middle. Continue this way, picking up 3 and missing 1 gold bead to go through the next gold bead, until you have 6 loops of 3 light blue beads.
Finish this row by going through the gold bead where the first row starts, and through the first 2 light blue beads of the first loop.
Row 3
Pick up 1 light blue bead, 3 gold beads, 1 light blue bead and go through the middle bead of the next loop of light blue beads.
Continue with the 1 light blue, 3 gold, 1 light blue until you have 6 loops and are back to the start. Go through the first light blue and first gold of the first loop.
Row 4
***
Pick up 3 light blue beads and go through the third gold bead of the same loop in the previous row. Pick up 3 gold beads, 1 light blue
bead and 3 gold beads. Go back through the light blue bead and the next gold bead ( ie. third bead in the first lot of 3 gold beads ).
Pick up 2 gold beads and go through the first gold bead of the next loop in the previous row. You have just formed a picot.
Continue from *** until you have formed 6 picots.
Go into the appropriate gold bead to finish ( first 1 under the first light blue loop in this row ). Blanket stitch your thread once between beads. Go through 2 more gold beads and repeat blanket stitch. Go through 2 more gold beads and repeat blanket stitch. Go through light blue bead and cut thread close to beads.
It may seem very fiddly at first, but they are quite easy after making a couple of them.
Saturday, August 27, 2005
Here's an update on Maureen's block. I tried so hard to stitch a cat but gave up after unpicking it several times and resorted to flowers once again.
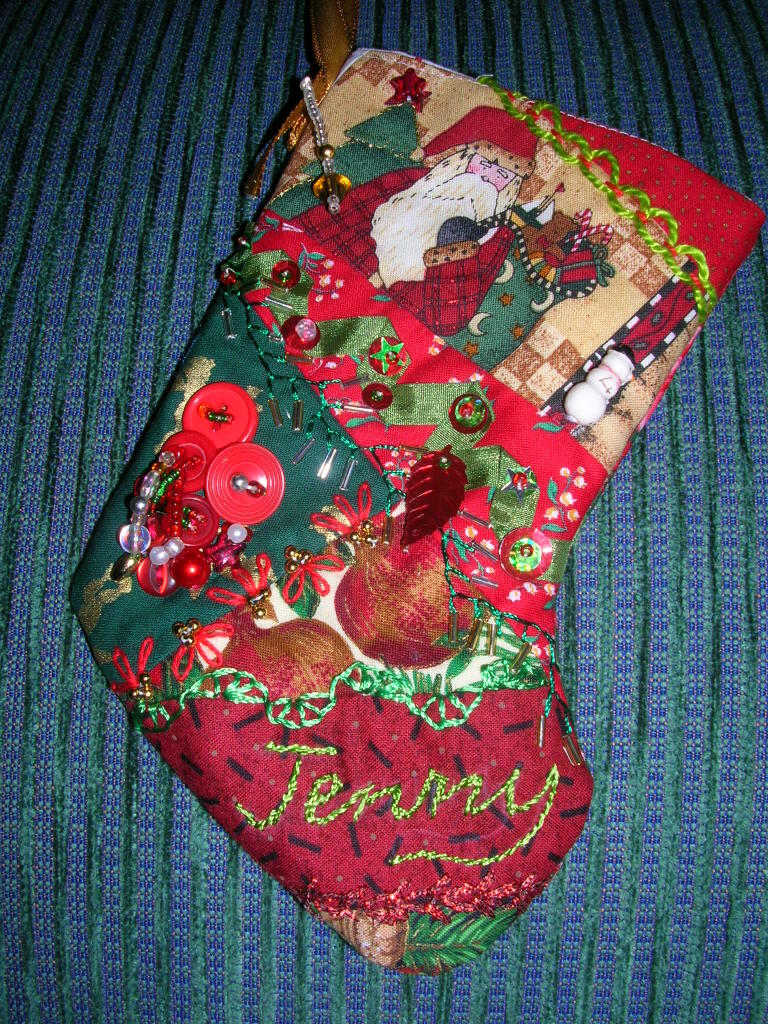
On the far left is the Christmas stocking I made for the mini swap.
Thursday, August 25, 2005
Eye candy for Inspiration
http://www.regencies.com/advanced_search _result.php?keywords=mary+frances"
For those of you looking for inspiration for your "Bags of Fun":
Go and drool over these little beauties offered for sale!
My thanks goes to an online friend down south for passing on this and other interesting sites.
http://www.regencies.com/advanced_search_result.php?keywords=mary+frances
As you can see I still haven't won the "battle of the Link".I'm a sloooow learner,doncha know!So,hoefully one of these will "work" for you and get you there
Wednesday, August 24, 2005
Trying to answer Belle's query
Link
Belle,I tried earlier to post a comment re adding "more" to a patch,but Mr Blog wouldn't accept my comments.
When I'm working on a block,I most always "do" seam treatments before I work on the designated patch.
Now,when working on seam treatments,I'm sure you realize that you don't have to confine your stitching to just covering a particular seam line:Whether it's a geometric style stitching(Cretan or flystitch or basque twisted),or a botanical style stitching(e.g vines,rambling roses,etc)or even a braid or a ribbon or lace, you can meander over several adjoining seams or patches.
If when you start on a patch,you have a theme in mind(Elly's scootin'boots) maybe you could add a hat,fringed skirt/jacket outline,whatever carries on that boot scootin' theme.
When in doubt,you can always add buttons,beads,SRE and create a bead and button trail, or using lace motif,charms create a trail that fits the theme.
Sometimes just adding a spray of greenery around the main motif helps "fill" the patch.
Try sketching to size,the patch you're working on: Add the motif(in this case the BOOTS) and play around with "what ifs" on your sketch;OR colour print off a scan of the block and plan your design on the paper.That way if you've got charms or beads etc you can place them on the patch and view the overall effect before you put needle and thread to fabric.
It's catching!

How and why
My problem is, I thought it would look better with something else there but I couldn't think what. Should I keep to the " cowboy" theme, or add something else , but what. I thought about some wavy lines of ribbon or flowers maybe, that would create some flow to the whole block, but that fabric has a marbly gold design through it and I wasn't sure what would work with it.
I'm wondering if you'd share your thoughts about how you decide what to add, to fill or not to fill, do you try to keep some sort of theme going, or just see what evolves. Would you plan from the start.
And if you did put more on that patch with the boots, any ideas what? And why? I realise not seeing the block 'in the flesh' makes a difference, but I'd like to get a bit of an idea.
">Link
Tuesday, August 23, 2005
Mini - stocking swap
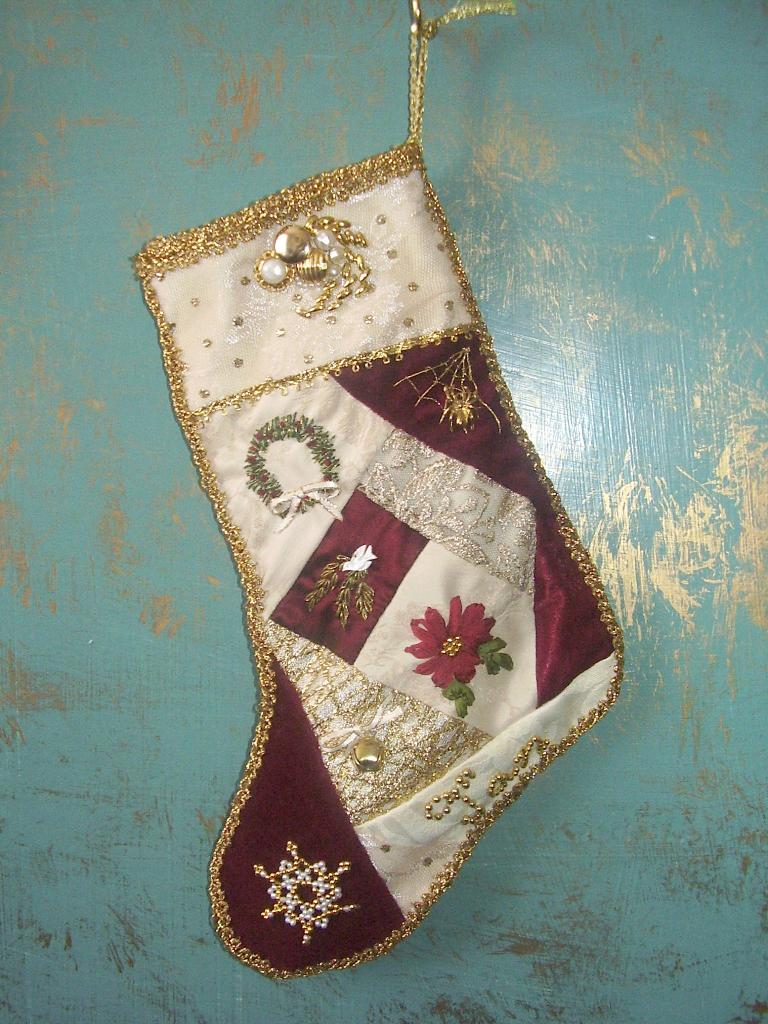
 I made this stocking for the July mini-swap. My first "proper" cq project. I had started another stocking which didn't work. This was a late Sunday night plan b, using whatever I had on hand, and I was very pleased with the result.
">Link
Elly's heart

">Link I embroidered a pair of bootscootin' boots for Elly, and attached twisted silk ribbon along the seam with glass beads. Jam-mam was kind enough to let me add lilypads to her frog.
Friday, August 19, 2005
In my spare time
Hello All,
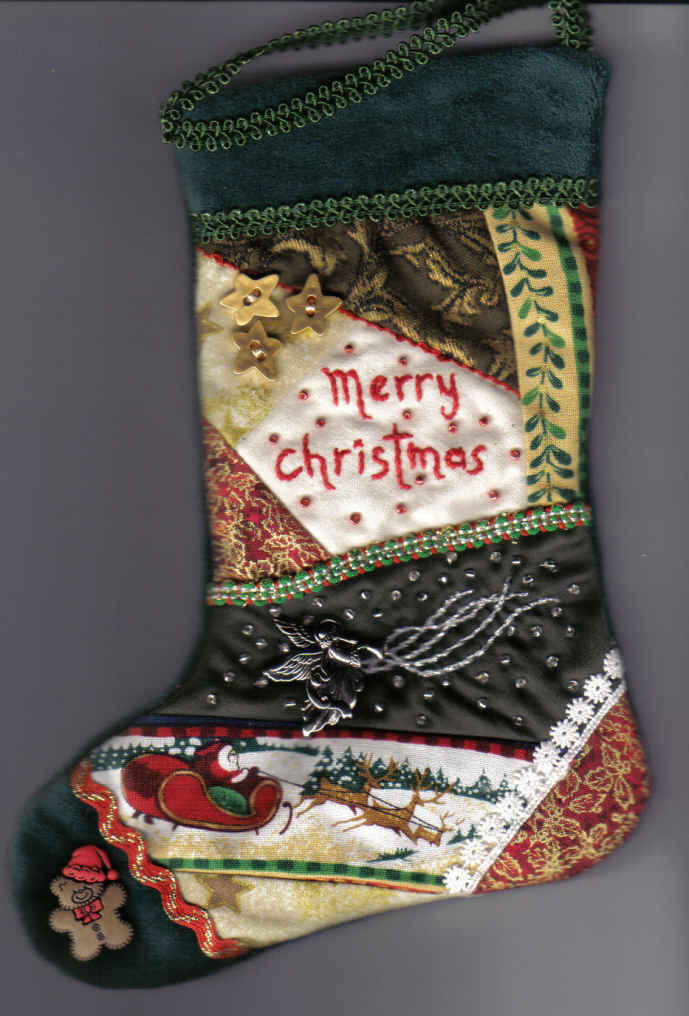
Just thought I'd give you a bit of a look at what I've been doing in between blocks for this RR. (I can post pics now 'cos Jenny has received it) This is a small version of the Christmas stockings that I do in CQ (my only real CQ that I had done previously) I have made one each year as part of my Secret Santa gift for a colleague, over the last 4 or 5 years, this smaller one I made for the Mini Swap Xmas in July. I must admit that my embellishing techniques have improved over time.
">Link
Sunday, August 14, 2005
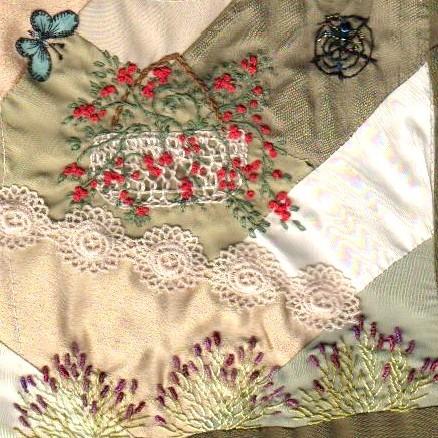
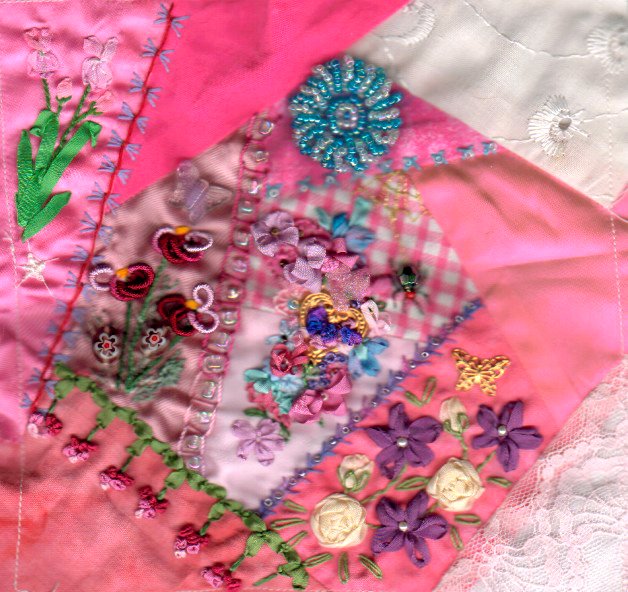
Joma's Block
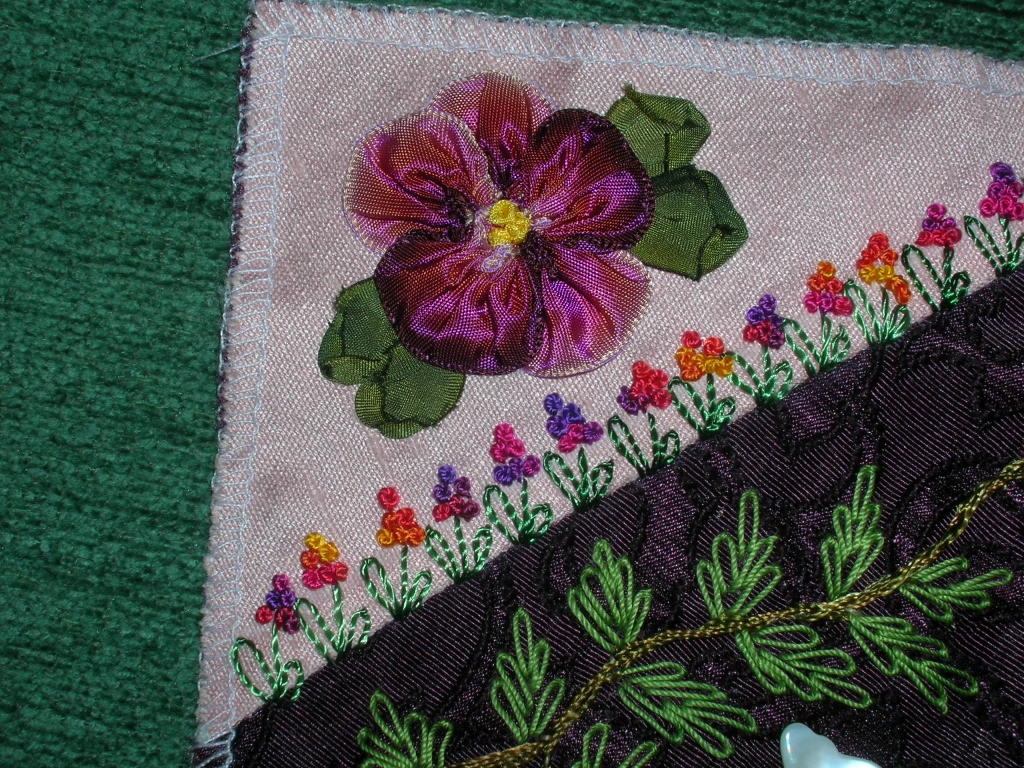
I have just finished Joma's block and it is looking stunning. In the top corner on a pale pink patch I worked a row of long and short lazy daisy and straight stitch in Edmar Iris green thread. For the flowers I worked a cluster of French Knots in Colour Streams Ophir silk (Venetian Sunset)
The wired silk ribbon I used for the pansy is 5/8" wide and in shades of pink through to purple with a bronze sheen. I used hand dyed bias silk ribbon for the leaves worked in ribbon stitch.
I hope you like it Diane.
">Link
Saturday, August 13, 2005
Links and spiders

http://www.sherrysbabies.com/crafts.html
Please bear with me---as I think that those of you who "know" me realise that computer literate I'm NOT!!
I'm determined to get this "link thingo" working for me:
On Sherry Wade's site ( http://www.sherrysbabies.com/ )
I found a pic of a lovely WHITE SPIDER on one of her blocks and wanted to share it with you(it's in Sherry's craft section as one of her CQ blocks)
So-- if my linking still doesn't work out,the addie is HERE (rather "up there" for you to copy and paste.
Time for a reminder
http://www.judithbakermontano.com/JBMwebsite/classes_html/classes_cq_q.html
A comment on another site reminded me that I had not checked in on Judith Baker Montano's site for a while;so I've been visiting and reading her current newsletter and discovering MORE ideas......like the Judith & Kathryn mermaid that she uses in her "Australian Mermaid".
I'd emailed Kathryn last week re pricing of their acrylic bead flowers,and below is an excerpt from her reply:
You can buy ".....a bag of up to 200 beads in varying sizes is $25 (+P&P $4). Normally They just come in colour ways, but I could hand-pick a bag for you if you just want a variety of certain colours, sizes and leaves.
The sizes range from about 5mm to 3cm…there is usually a wide range of sizes in a bag."
according to my email from Kathryn.
So does anyone know of a cheaper rate?BlogItemURL>
http://www.judithandkathryn.com/mambo/index.
http://www.judithandkathryn.com/mambo/index.
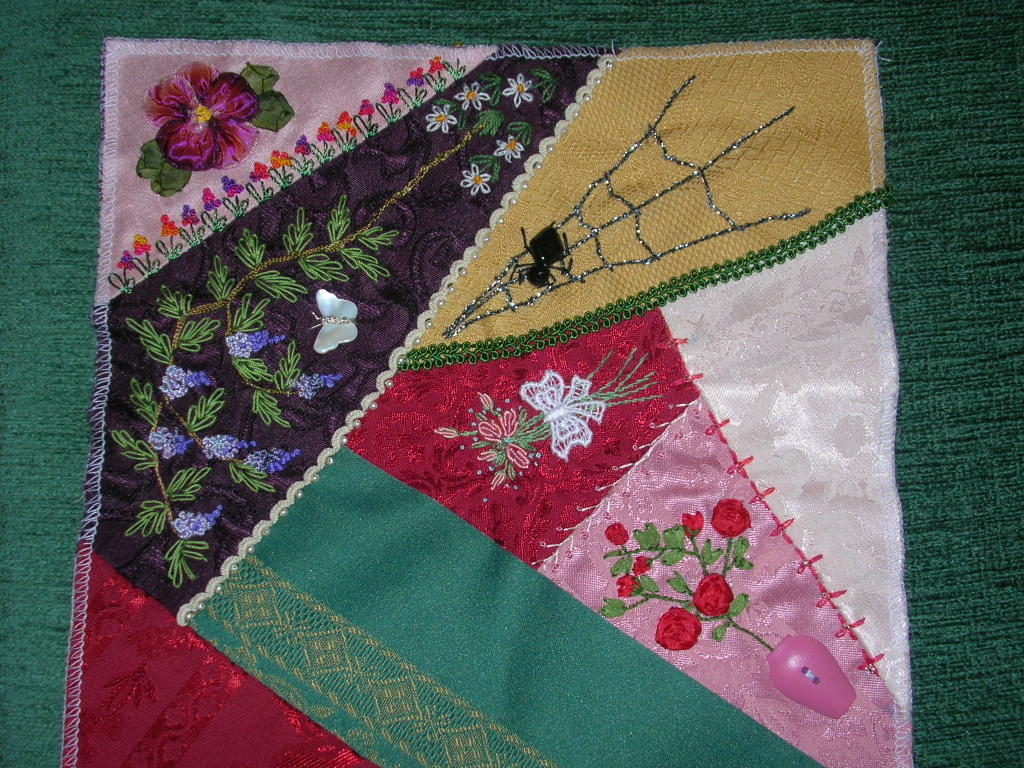
Update on Miss Nance's block
Link

I really like the way this block is turning out. After I decide what to add it will go to Trish and then it will be coming home.
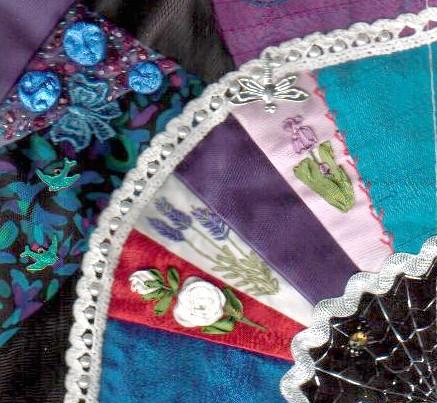
Belle's spider web is just breath taking - good job belle. The web is really delicate and the spider is so real she could walk of the block at any minute. Other things I like about this block are the green vine with metallic red leaves by Kellie and Elly's lace basket is very pretty too, the beads she used don't show up at all on the photo. Elly I love the burgundy lace/braid you used :) The photo doesn't do the block justice, Gail added some really bold ric rac which you can't really see very well in the picture, nor can you see all the sparkly threads everyone has used.
Right now it is my turn and i think I will ... ponder for a while :)
Friday, August 12, 2005
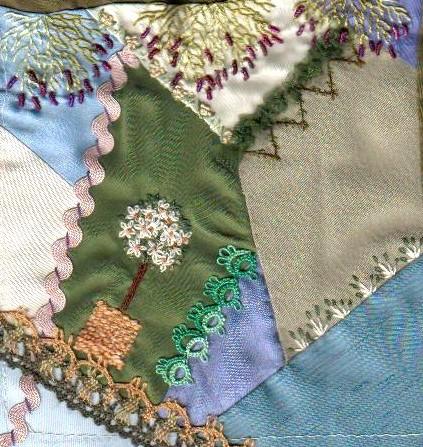
My Herb Garden


Thursday, August 11, 2005
Posted by Picasa
Very tiny Block
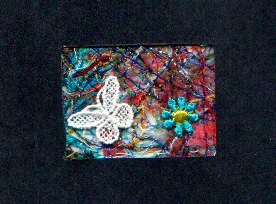
After reading an article by Cindy Thury- Smith last year on using scrap threads and Solvy together,I thought that I'd experiment.
Having ended up with a piece of "whole cloth" I then cut it into smaller pieces,to "play" with.This one has only a motif butterfly and a daisy added.
With such a "busy" fabric,not too much extra embellishing is needed---maybe a MoP motif for a second block??
And at this point,my apologies!Earlier today my filing cabinet was literally dumped on the floor,in preparation for repositioning furniture,and the folder with info pertaining to the procedure is "missing in action" so the link will be added at a later date.
Posted by Picasa

Posted by Picasa
Sunday, August 07, 2005
Your photo needs to be hosted somewhere on the web. Belle you have a webshot account (or whatever it's really called but you know what I mean) so use that.
For each picture you will need to know the URL or address of where it is hosted. If you are not sure right click with your mouse on the image and choose properties at the bottom of the box. You will then see the URL you need in full.
Now you need to type the following code in your blog message
< img src="
them type the URL
them type after the URL
" >
so for a photo of my block which I resized and then put on my website I would type
< img src="http://www.mpquilt.pwp.blueyonder.co.uk/Cnv0048.jpg">
To get the code to show up in this message I had to add a space after the < and before the > in all three instructions so remember that the only space in the real code is between the 'img' and 'src' - if your code does not work check your typing even one pace, comma, spelling mistake etc. means it will not work!
And when I type it properly it looks like this

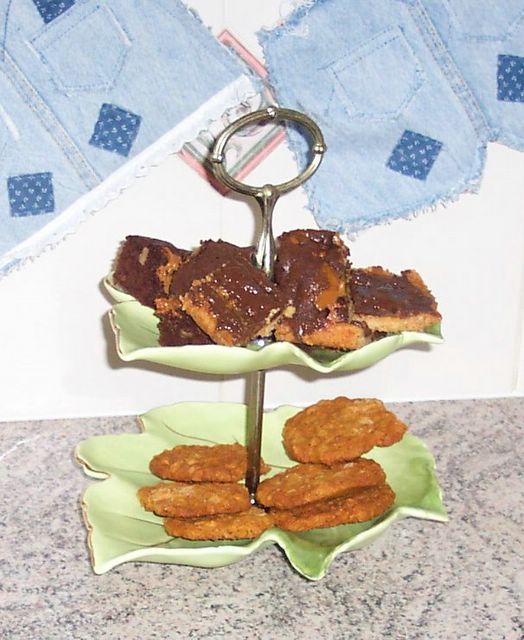
Maureen, they look good enough to eat! but I am trying to be good and loose some weight before the winter comes and I put on my 'keep warm fat' for the season, so naughty, naughty to tempt me so :)
Saturday, August 06, 2005
The lower tier are Anzacs,to keep my DH content;the upper tier has Chocolate Caramel Slice and Chocolate Caramel Brownies!
Posted by Picasa
If you click on http://www.blogger.com/home
you'll end up at "Blogger dashboard"
In the Blogger news,you'll see "Blogger Images"
Click on the link and try it out!
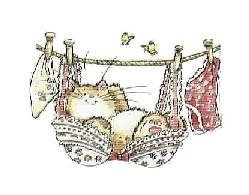
It works for me and that's saying a LOT!! (I uploaded this "Uplifting scene" from my files)
Good luck!
Maureen
I confess, couldn't post a picture, have tried everything I can think of, to no avail. Even managed to post an empty blog vbg
Guess I need a lesson from a clever blogger :)
belle
Thursday, August 04, 2005

Another not so naked fan block;this time MaxineJ has worked on it

I'm trying out posting pics using the "new" blogger upload,so with fingers crossed,I announce:
This is one of four fan blocks that I sent out in another "Fan dancing" RR;I thought you might like to see what happened to my naked blocks.Thanks Marian!
Tuesday, August 02, 2005

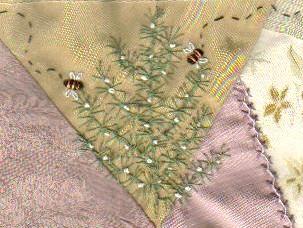
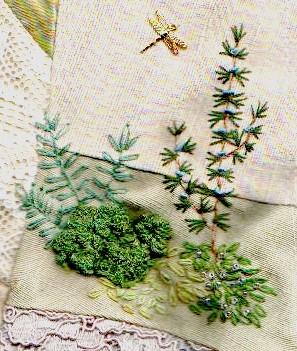
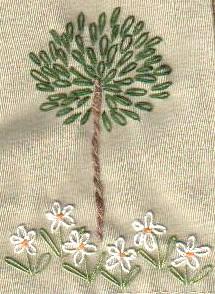

Just a few pics of my work on my very first RR. It's theme was a Herb Garden. The first block I tackled was Culpeper's Garden which is the one with the bee skep. I'm just finishing off the last block now before it goes back to its owner. Can't wait to see my completed garden. At first, I was so daunted by everyone else's gorgeous work that it took me ages to begin. I felt the very same way about the craft swaps, but find it's so much fun taking part in them and have learnt so much and made so many new friends. I'm doing things now that I would have once thought way too difficult.
OOOOh! I can't help myself!! That gingham patch I left vacant on an earler post: I just HAD to add something:the something being a spider!
I hope I've left enough room for the remaining RRers.
Monday, August 01, 2005
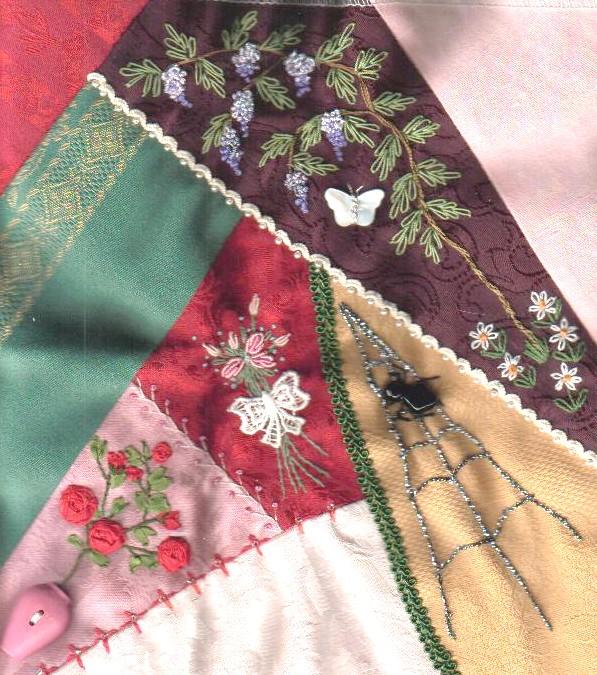
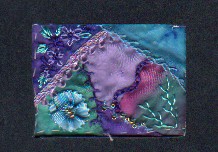
Hi Everyone, I thought it was about time I joined you. Here's a pic of Diane's block which is now on it's way to Hope. I first stitched a row of scallops in cast-on stitch then added some pearls. Next some wisteria was planted with couched stems, lazy-daisy (detached chain) stitch leaves and flowers of varying sized French knots. I finished off with some lazy daisies and a MOP butterfly overstitched with gold metallic thread.
Helen

Posted by Picasa
At last Belle has found her way into Blogland!
Between the two of us,we left her out in the cold because she'd been so busy over in W.A. for a while,and I'd forgotten to renew the invite.
Belle,you may find that if you download Flickr to your PC you have a site of your own to store your pics and scans online;but I have since made the move to Picasa and Hello,because I find them more to my liking---
I can use them for attaching pics to emails as well as blogging direct.(Now 'spose I've totally confused you?? Didn't mean to :-(
Anyway..go to the home page of Blogger and you can see what to do!
Maureen
![]()

