Tuesday, January 31, 2006
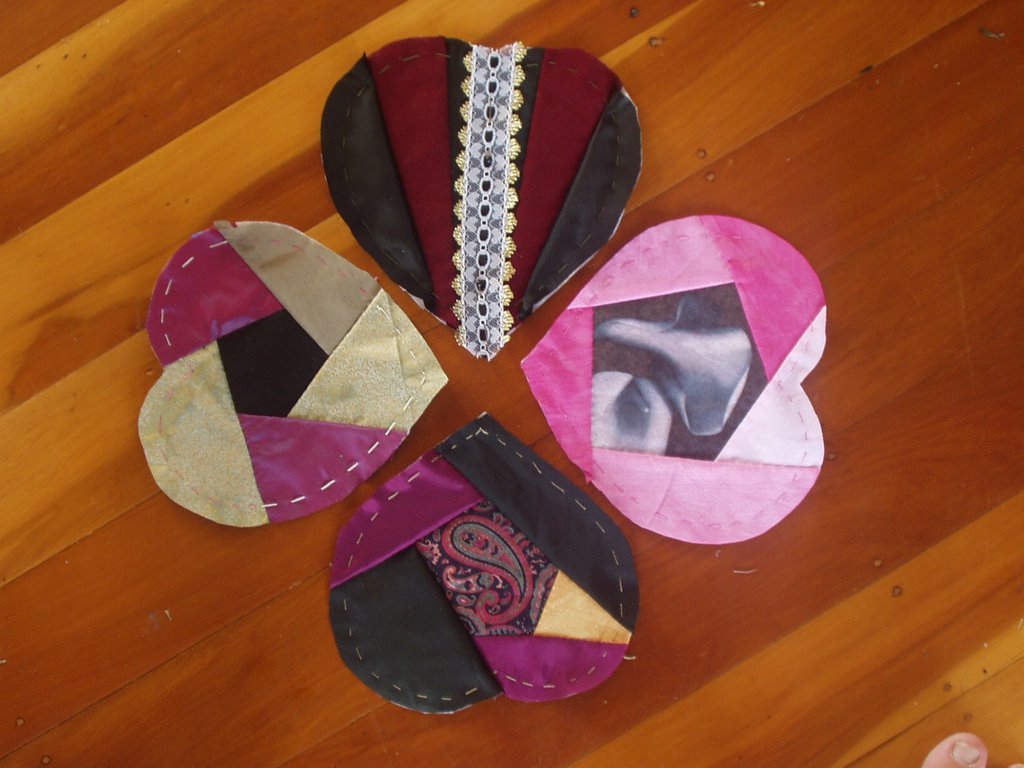
4 more hearts
Wednesday, January 25, 2006
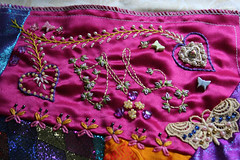
A closer look!
Here is a closer view of roz's work. DD's initail is obviously M and she will be thrilled with this i am sure. both Maureen an Roz have nade really god use of their blocks and chosen nice contrasty threads. DD is at school right now although i'd love to go and drag her out to show her (MUM!) I guess that would rate pretty high on the embarrasing mum scale - believe me I'm already way up there anyway!
thank you again to maureen and roz - this block is now with Ronnie, more piccies later :)
thank you again to maureen and roz - this block is now with Ronnie, more piccies later :)
DD's CQ block2
At least i think it's block 2 - I loose track. Anyway, the important thing is LOOK!!! It's beginning to fill up and isn't it lovely. What I like about cq as people get more confident they begin to cover the whole block rather than doing a shy little flower in one corner it becomes a riot of colour! Isn't it wonderful?
Australia CQed!

Tomorrow,January 26th we in Australia commemorate "our day": Australia Day.
In a newsletter received today from Pamela Gurney who is fanatical about her "dancing needles" (Punch needle embroidery) was this glorious CQed map of Australia and a little poem written by her daughter Cara in 1994.
I'm sure Pamela won't mind me sharing it with you!
By the by,if you get a chance,check out her books:
"Punch Crazy"
Punchneedle Embroidery Dancing Needles"
and she says that she's working on yet another book.
Happy Australia Day!

Wednesday, January 18, 2006
Post cards,ATCs and Journal quilts
">Link
I cut and pasted the following info from Postmark'd Art http://www.postmarkdart.com/faq.html
after a few emails to Franki,
as I thought it may help those of you who are thinking of coming to play with pinup and others in an upcoming swap.
Please remember that any postage details mentioned pertain to the USA .
I have NOT checked with Ozpost,
although maybe Joschaefer can help out with info.
Frequently Asked Questions
Q:Are they really made of fabric? And can you really mail them without an envelope?
A Yes! They are small pieces of quilted art. Some are fairly stiff, while others are flexible. They must be no larger than 4" x 6" and no thicker than 1/8" in order to be mailed. The postage must be hand cancelled, and they require a 37-cent stamp instead of the regular postcard rate.
Q: Is the address side paper or fabric?
A:In most cases, the address side is fabric, usually fused to a non-woven stabilizer such as Decor Bond. A few of the artists use heavy card stock (paper) for the address side.
Q:If you use fabric on the address side, won't the stamps fall off?
A: We’ve found that if you use the self-stick stamps and rub them firmly onto the card before mailing, they stick just fine.
Q:What kind of pen do you use to write on the address side?
A: The best pen is one with pigment ink, such as a Pigma brand felt-tip or the permanent gel roller pens sold for scrapbooking. Sharpies work as well, but after some period of time the ink will begin to spread, leaving an unattractive brown halo around the letters.
Q: How do you make them? Is there batting inside?
A: Construction techniques varied, but most of the cards were made this way: Decorative fabric, thin cotton batting and muslin backing were sandwiched, quilted, and embellished, then trimmed to size. A separate muslin, sometimes fused to stabilizer, was added to the back of the quilt to form the address side. The edges were bound with fabric, zigzag, satin stitch or decorative stitch.
Q:What about embellishments? Can I use anything on them?
A: We stuck to flat embellishments. Sequins, stitching, couched yarn, very small seed beads, and even feathers went through the mail with no problems.
I hope this helps those of you wondering "where" to start.
Now,go play !
Tuesday, January 17, 2006
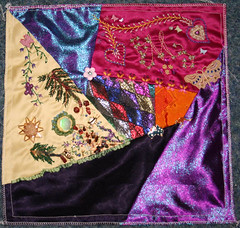
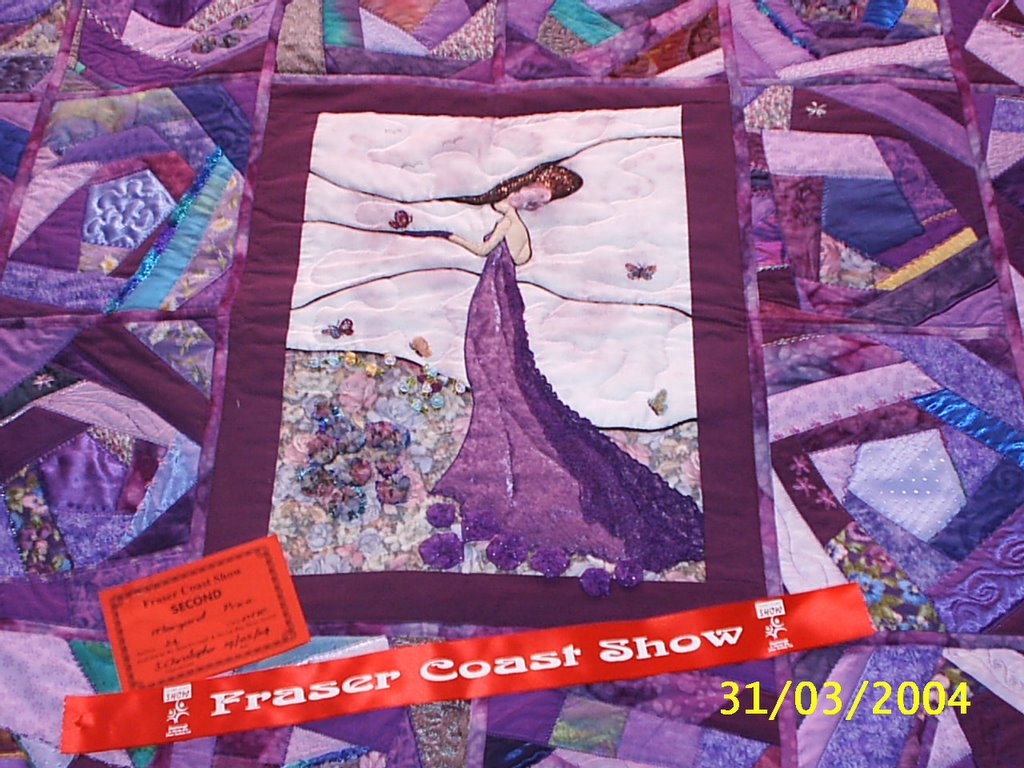
about the crazy quilt
,Jacqui, Jo Ulla, thanks for the kind words. The quilt was all free hand with each block 12 '' x 9 '' ( I think).The centre was done from a pattern but I embellished it more, to match in with the blocks which were mostly made from scraps. I did have to but some material. I did not over embellish the blocks Each block was done with batting attached, so when they were all done I butted them together and joined them with a home made half inch strip, at the same time backing and quilting as I went which is easier than trying to do a full quilt at one go. I was persuaded to enter in the Maryborough show, and was thrilled to get 2nd place. Sadly I have not done a big project since, but have played with all sorts of little things. My next major project will be a table runner for my sister in Wales., for which I am still gathering material, in the meantime I am playing with hearts, and mobile phone bags. Cheers, Margaret
">Link
">Link
Monday, January 16, 2006
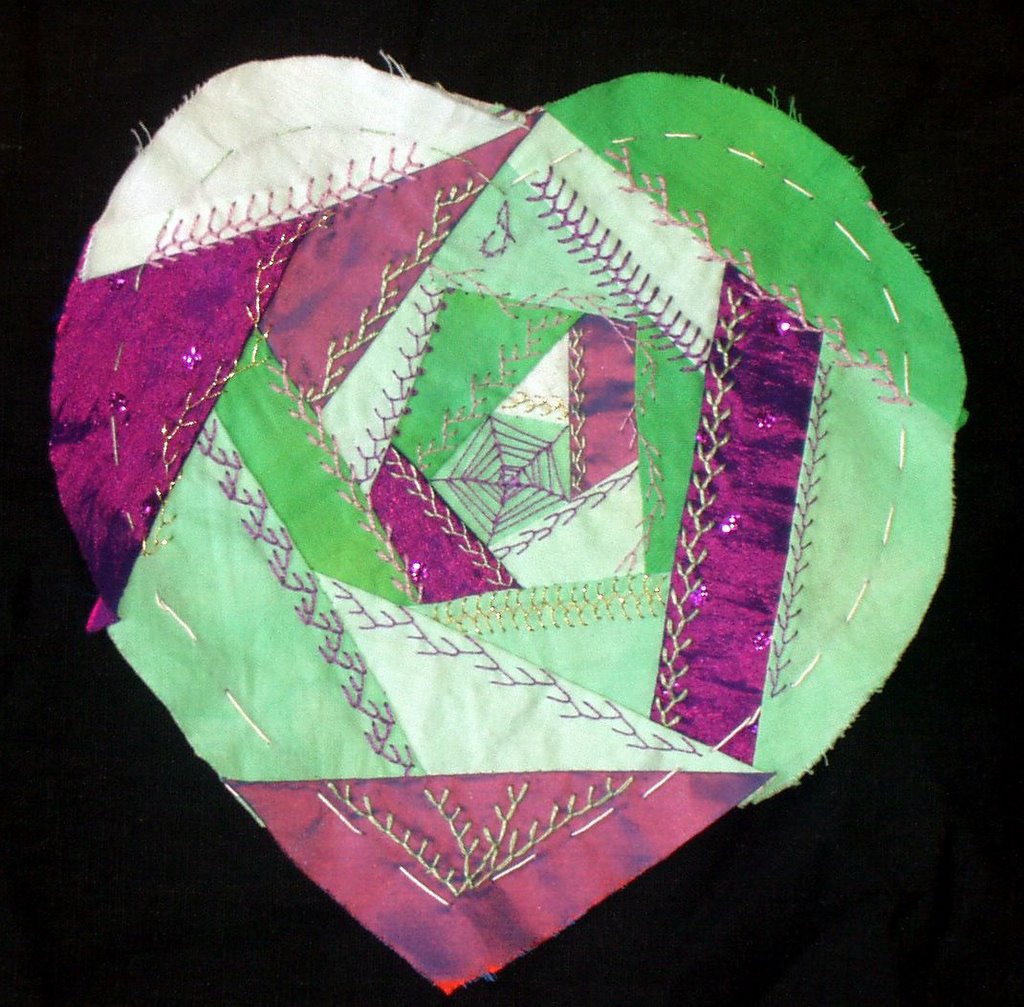
Heart templates
Jacqui was asking whether I'd used a template for my hearts (made for swapping via the Chain of Hearts group) and I thought ,maybe I ought to explain my way of tackling them:
The heart needs to be six inches complete,plus a half inch seam allowance.
I initially scanned and printed a six inch heart shape and then using an 8 or 10 inch square of STIFF card cut a heart template from the centre.
This serves two purposes:
the heart shape is great for marking the outline on the fabric,
and
the "window " I like to use to view my work without the distraction of raw edges and backing fabric.
I also like to place the completed heart in the "window" template for scanning or photographing as it gives a neater look.
So, to build my heart I commence with a square of foundation fabric generally at least 9 inch square( because I like embroidering and embellishing with my work in a hoop)
I mark a heart outline centrally on the wrong side of the foundation fabric and then start laying the CQ patches(on the "right side") until the area is large enough to use the template and mark out the heart shape.
I generally tack a stitch line around the area to show the borders and another basted line to remind me of seam allowance.
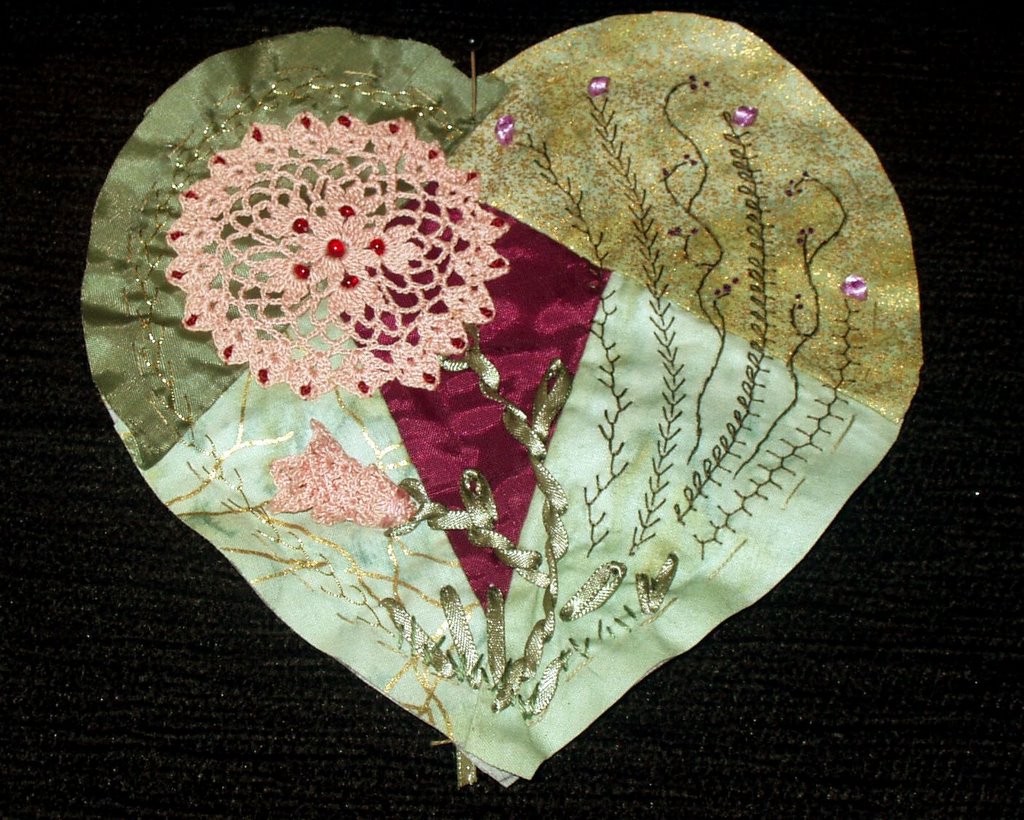
HEART# 2
Saturday, January 14, 2006
My first Heart
Friday, January 13, 2006
This "n that
Link
I wonder if anyone has noticed that the Blog template looks more organised?
All credit is due to Peter who took pity on a "desperate blogger" and is slowly sorting out whatever I did that mutilated the original Template.
Hopefully, P is going to add a list of CQ related Blogs in the sidebar for me and then you'll have a wider variety of eye candy to drool over.
And while you have a minute to spare,why not visit his Blog........
Crookedpaw's Retreat
I can only hope that he doesn't mind being swamped with female visitors!
Thanks,Peter!
cqcrazy
This is a quilt I made for my grand daughter for her 16th birthday.
I'm feeling very clever,that I worked out how to get this pic up....Margaret
cqcrazy
Seems that having Taffy on the Blog, has put a stop to all the crazy pics. Forgive him, he is a little crazy tooooooo.I'll try to put a real pic here. It's on a CD that my daughter did for me, so I'm not really sure how. Here goes........Margaret
Friday, January 06, 2006
For Dreamer!
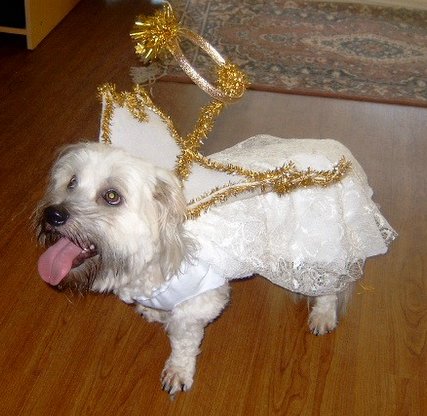
Introducing Taffy in his Christmas Angel mode!
Thursday, January 05, 2006
CQ Crazy
Crazy I have tried to put up a picture here, but after I click on the little picture and put the name in and click on browse nothing happens. HELP. thanks Margaret
cqcrazy
">Link Thanks Maureen..........sometimes I don't know who I am either !!!!!!!! and I haven't mastered putting up a picture yet, but still trying.........I do enjoy looking at all the other entries so keep it up girls. Margaret in sunny Queensland
Wednesday, January 04, 2006
Welcome Margaret
Link
Most of you know Margaret as dreamer..........she's finally come into Crazy to play here too!
I see she's chosen welshmaggie as her name here......I think she's trying to confuse us!
Sunday, January 01, 2006
Easy Tufting stitch

Insert needle from the right side(top) of the fabric,leaving a 3/4 inch tail of yarn.Bring the needle back up at a point very close to the tail of the yarn.
Re-insert the needle a very short distance from the exit pointand pull through to the long side leaving a 1/4 inch loop of yarn on the top.
Continue until stitching line or space is covered with loops;end stitching line with a 1/4 inch tail of yarn on the right side.Insert the tip of scissors into each loop and snip open.Trim tufts evenly.
Do not allow excess yarn to become twisted,knotted or looped as you work these stitches.If your yarn twists let needle dangle from fabric & it will unwind itself.
I tend to use 2 or more threads doubled for this stitch.
And yes I've repaeated myself,just in case you can't read the scanned directions!
I have made Candlewicked cushions that have regularly been machine washed for 2o years and the tufting is still firm!
![]()

