Wednesday, November 30, 2005
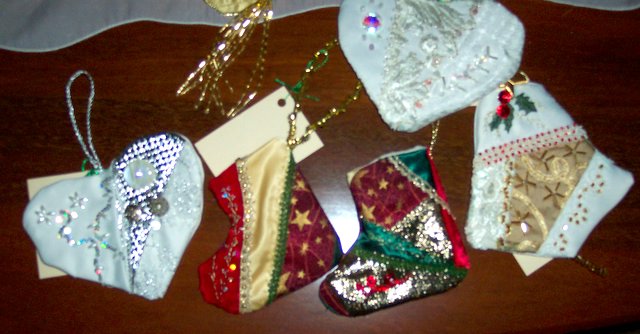
Geminista's four

Helen has sent four ornies,each of which has the year 2005 stitched on the back

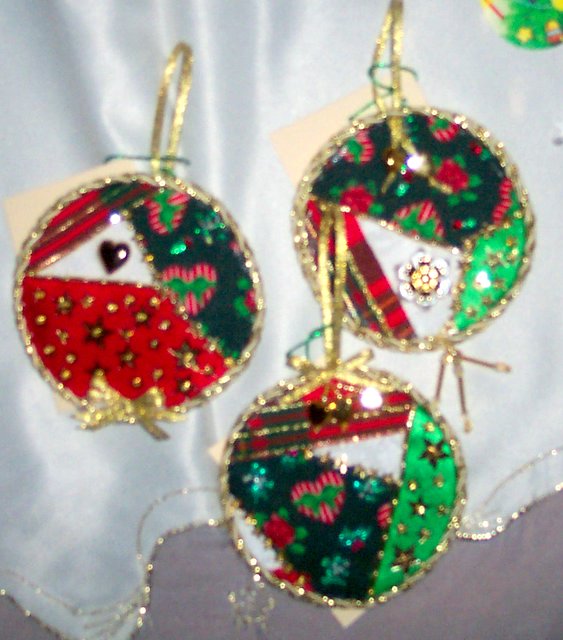
Jam_mam's!
I think jammie had a better pic on her "allstitchedup"blog.....Sorry J
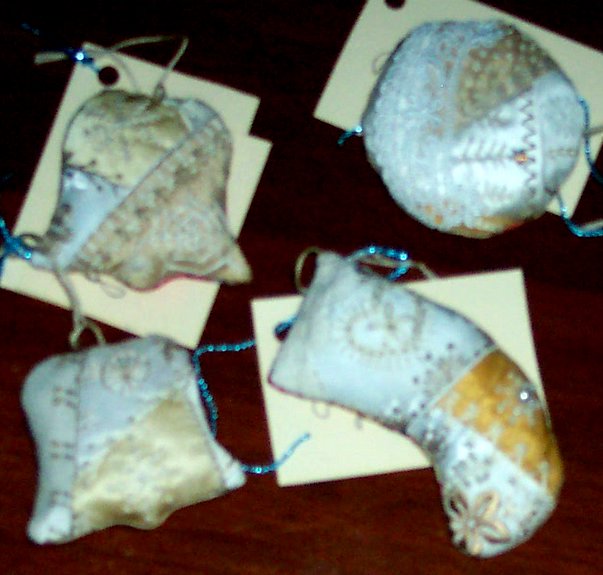
Maureen's five
I think these are the five ornies I'm using in this swap!
I have at least another dozen hanging around for other swaps!
I'm just about ornied out!
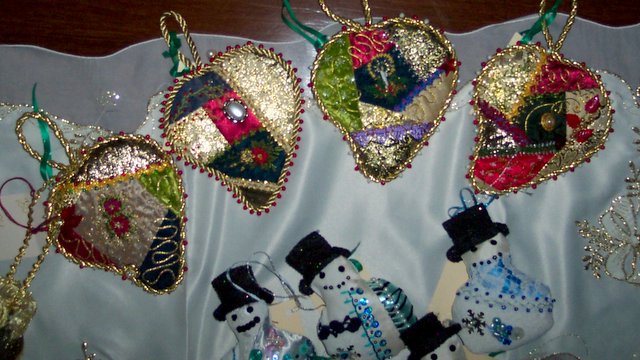
Four hearts from Mrs_Mik
Butterfly -blue
Joy says she's never done CQ before this attempt,as she prefers beading!
Sub-tropical snowmen

Hope provided these five SNOWMEN!
And it was before we had the hail storms!!
Lyn B's offering
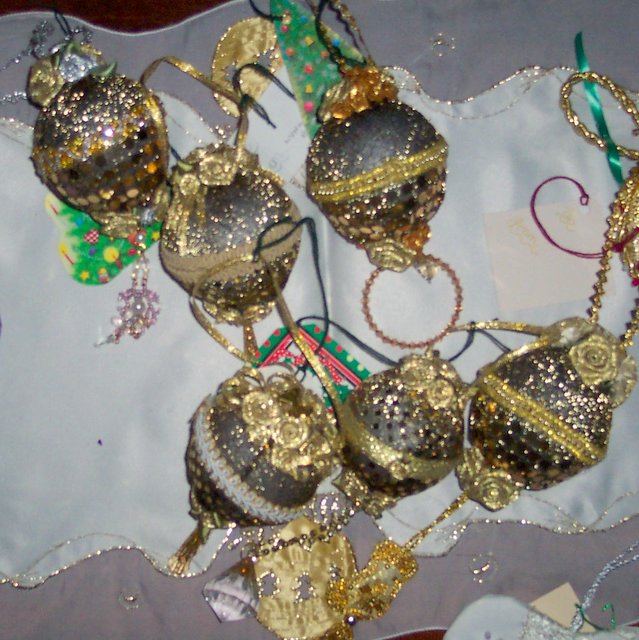
Six golden balls and each with a different tassel treatment
From across the Tasman
From Ted

More of them!

To whet your Ornie appetite
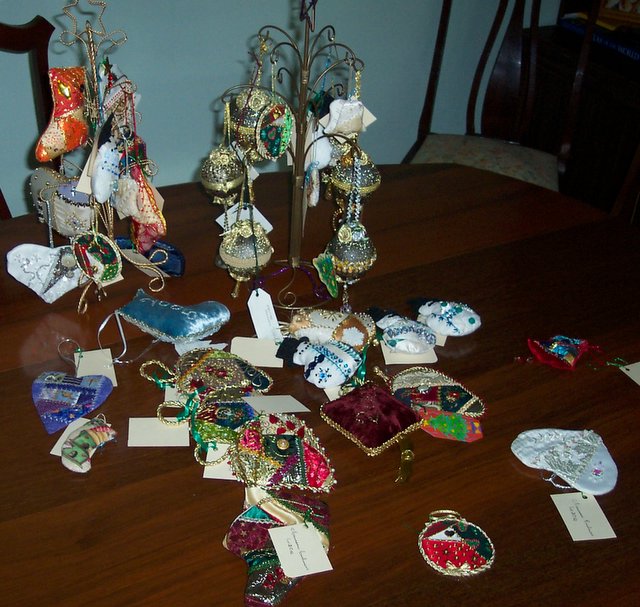
Some of the 28 ornies that arrived for swapping........more and better pics to follow!
Tuesday, November 29, 2005
All that jazz cq block
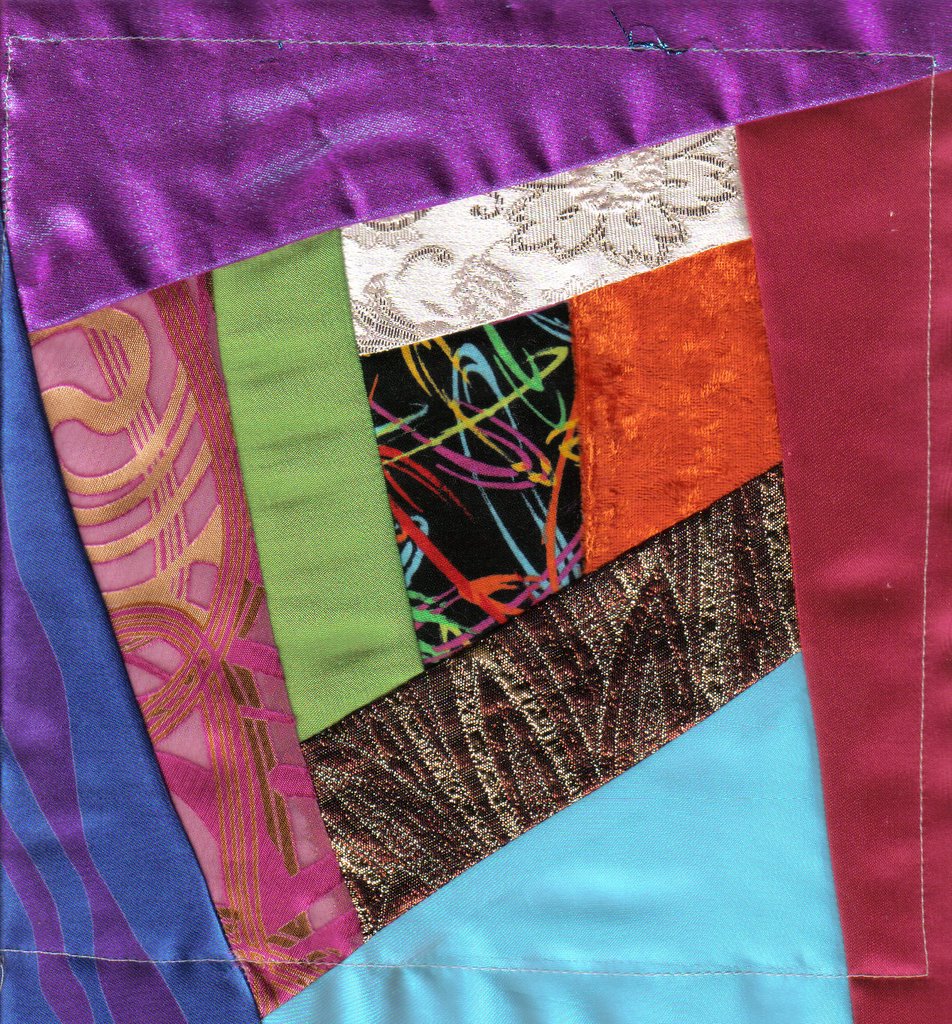 I'm doing a block for " All that Jazz "as well, and like Jammy, will have to sew speedily - at least I have some extra days as mine doesn't have as far to go :)
 For anyone not familiar with the ' All that Jazz" project, here's a link that will tell you about it, and there's some photos of blocks in progress.
http://www.flickr.com/groups/56949816@N00/
Jam-mam's block

Here's Jam_mam's block now that I've finished working on it. Jammy instructed me to "knock myself out" - so I did :) There's a few seam treatments in there, then I added the swirly number in gold braid and red beads, planted a garden for Elly's lace maiden to wander in - hope she looks out for the spider just ahead of her ! I added a wooden button with a sweet smiling face and couched some vari-coloured yarn around her with crystal, blue and green beads. I felt she looked like a serene earth mother, so she has stars above, and the green and blue of ocean and earth below. Thanks to ... I think, Pinup ??? for the inspiration.
Hope you like it all Jammy.
I'll be sending it off to Kellie this week, last stop before it comes home, you' ll have to be patient for just a little longer Jam :)
">Link
A small bag!
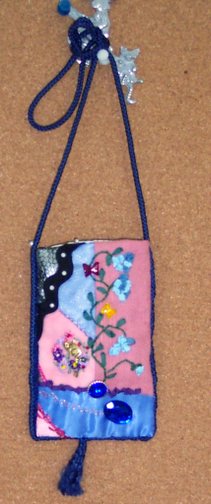
Made for a friend,as a carrier for her Mobile;I'm still debating whether to tizz it up a little more
Monday, November 28, 2005
A leaf for Belle

I think that this sketch may be more more legible!
Draw your leaf shape,and then using either Edmar Glory thread,or one strand DMC silk,rayon or cotton,follow the directions until the leaf shape is filled in.I generally use a milliners needle for this,particularly if using Edmar rayon threadsand I usually stitch the A B stitch TWICE.
A leaf for Belle!

This is the way I tackled the Holly leaves on the Christmas bell;I used either an Edmar Glory(rayon thread used in B.D.E.) or a DMC single strand silk (I forget which.)I tend to use this method in most leaves that I stitch for CQ motifs.
Sunday, November 27, 2005
Yeah!! another completed project.
 I have finished another project!!
I am happy with the handles I chose. This is the first 'proper' bag I have made, with a lining even!!
I haven't done any embellishing or stitching on it. I think it is lovely the way it is...hopefully my sister thinks so too.
'Happy Christmas Natty Girl.fa la la la la, la la ,la ,laaaaa"
all that jazz block
Just starting my All that Jazz block please see my blog for full details and links but I thought I'd share the photos here too :) Deadline 8th Dec - need to get sewing!

Friday, November 25, 2005
Recipe for bag!
http://www.flickr.com/photos/kenmaurscorner/
Here'sa brief run-down.The outcome is only limited by your imagination!
Take one pair of jeans or a denim skirt----
(From experience,the smaller the size the better!)
I picked up a couple of pairs of kids size for a couple of dollars at a local op-shop.
The bag I'm doing at the moment were a men's size (LARGE) and as I didnt want a suit-case I had to cut them down.This I did on the back after removing one pocket and repositioning the other pocket in the centre....good for carrying mobile phones!
I leave the front pockets whole as they're good for all sorts of things(just watch out you dont stitch THROUGH the pockets or you cant use them.)
I cut the jeans just above the crotch but dont sew it up until you've sewn on whatever you want as decoration.
Sew up crotch;Make a lining to go in bag........I attach to the lower edge of the waistband,after I've attached straps.I also like to add a couple of pockets in the lining.
My first bag I used Timtex as a stabiliser in the base,but I wont go that way again (more time and more weight in finished bag)
Another idea is to "turn" the jeans so you have part front,part rear as one side and the same reversed for the back;This way you can end up with a Vee shape at the base of the bag
And that's about it!
Bon appetit!
Monday, November 21, 2005
Natty Girls Sha Sha Dream Bag -WIP
This is my latest bag . I'm really liking the bag projects, mainly because I'm FINISHING them. I used a tutorial from the 'Craftster' site .
I thought it was cute, and easy to do because it was one piece of fabby + lining ( which it is if you do it with the fat quarters)...but in hindsight, not a good pattern for a CQ project done with upholstery samples, but live and learn, ah?!. Its going to be quite bulky to sew up. I haven't decided what to do for handles yet, fabric or maybe a trip to spotlight to find something a bit flash.
This is for my sister "Natty Girl" for christmas.
I have also started a blog of my very own and , according to my stats, I'm the only one to visit so far. Please put me out of my misery and drop on by
www.nzjo.blogspot.com
I thought it was
 cute, and easy to do because it was one piece of fabby + lining ( which it is if you do it with the fat quarters)...but in hindsight, not a good pattern for a CQ project done with upholstery samples, but live and learn, ah?!. Its going to be quite bulky to sew up. I haven't decided what to do for handles yet, fabric or maybe a trip to spotlight to find something a bit flash.
This is for my sister "Natty Girl" for christmas.
I have also started a blog of my very own and , according to my stats, I'm the only one to visit so far. Please put me out of my misery and drop on by
www.nzjo.blogspot.com
Friday, November 18, 2005
Tempting fate
Following on from an email from Jennifer on "Bloggers who embellish" telling how she adds links to her BLOG Neefer Sews,Gardens & Heals.
I was able to add Links to my trial blog
I was able to add Links to my trial blog
Wednesday, November 16, 2005
Hand bag eye candy
I came across this exhibition of hand crafted handbags. It's mostly crocheted work, but there is a few CQ pieces, and they are all lovely to look at.
Ahh, wouldn't free form crochet be an excellent addition to CQ projects....but sadly, crochet is the one hand craft that the previous generations of women in family did not practise, and I have never even seen it done.....
I see that Linda over at http://chloesplace.blogspot.com/ also linked to this site. My, my, even the cyber world is getting smaller. Also, check out http://rickrackruby.blogspot.com/ if you get a chance. Laura does some amazing things , including crazy patch, with ties!!
Monday, November 14, 2005
Marking tools
On another site devoted to CQ,a discussion on marking tools came up with these hints,which in view of my recent boo-boo I'll pass on and maybe save some- one from grief.
Marking Tools:
I often use chalk, but then baste over with with some of the icky cheap sewing thread that I always seem to have around. This is a good method, particularly if you're going to handle the project a lot or not be able to finish the marked area promptly. I frequently use wool for my CQ projects, and chalk just doesn't last very long on wool. Another method is to use tissue paper for a motif. Trace or draw your pattern onto the tissue, crumple it up tightly (to weaken the paper) then flatten it back out baste or pin it to the desired area. Embroider through the tissue, pulling the stitches fairly snug, so that they are firm once you tear out the paper. I don't love this method, but sometimes it's the only thing that will work.A friend mentioned using sticky labels for marking. Cut out your shape from the sticky label, then stick it down, embroider around it, then remove. You could do the same thing with freezer paper if your fabric could take the heat. I could be cautious about leaving either of these materials stuck to the fabric for very long, particularly the sticky labels. That of course would depend on the fiber you're using. I wouldn't do it at all on velvet, for example. But then, I don't like embroidering on velvet, so there you go.Another one that I've recently tried for simple outlines is to draw the shape onto a cracker box-weight cardboard, or on a clear plastic lid like from a coffee can. Cut out the shape, and using a paper punch, make a hole in the middle of it. Pin the shape to the project through the hole. If the shape wants to move around as you embroider, cut two holes and use two pins. Beware, however, that pinning through the hole puts quite a bit of pressure on the fabric right at the hole, and it did leave a little raised round dimple on my project. A quick shot of steam cured the problem right away, though.
These gems of wisdom came from Janet of www.sewunique.comInnovative Products for Sewing, Quilting and Beading<http://www.sewunique.com/ba.htm>
Other marking tools include the purple "quick fade" felt pen,soapstone and even dried slivers of soap (dark fabrics) and tailor's chalk!
Pattern for strip pieced stocking
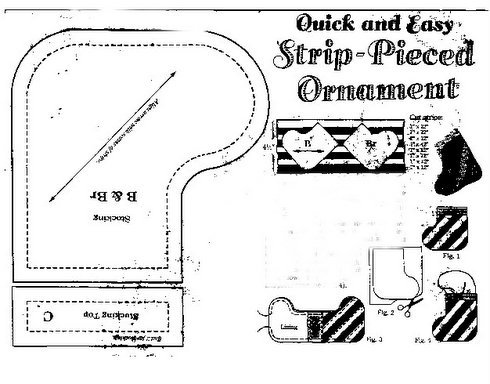
The instructions are in the previous posting:
Fig 1 shows stocking with top attached.
Fig.2 cutting two linings
Fig.3linings attached with opening left for reversing.
Fig.4 positioning lining inside stocking.
(The scan "should" print out to a 3" by 4" drop
when you click,save and print!)
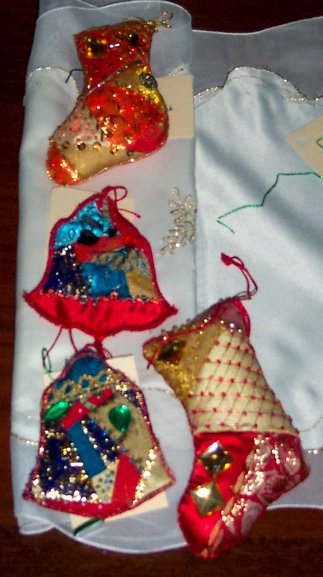
Christmas stockings

These wee stockings are based on a strip pieced P&Q pattern and are lined so that a small gift can be hidden inside.They measure 4 by 4 inches.
The strip piecing calls for
eight strips of fabric 1" by 12 inches long,sewn together to make a rectangle 4 1/2 inches by 12.
From this piece you cut one shape (B)and oneREVERSED (Br)
Then cut 2 pieces one inch by 3 inch for stocking top(C)
With right sides together stitch B to C along top edge and repeat for Br.Press open.Cut linings same size as B/C and Br/C.
With right sides together,stitch a lining to the C along top edge with a 1/4inch seam.Repeat for other C;Press lining away from stockings.
Placing right sides together,stitch around stockings and linings leaving an opening in the base of thelinings.(fig 3.Clip curves as needed and turn right side out through lining.Stuff lining down into stocking and press top edge.
(I'll now attempt to clean up diagrams and post in next edition!
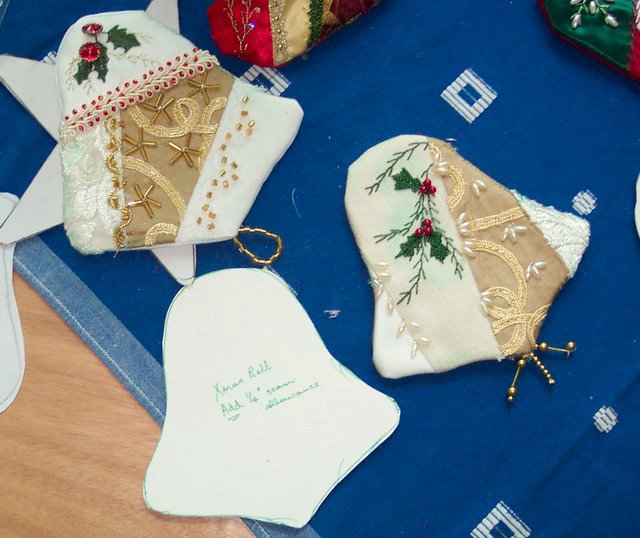
Xmas bells
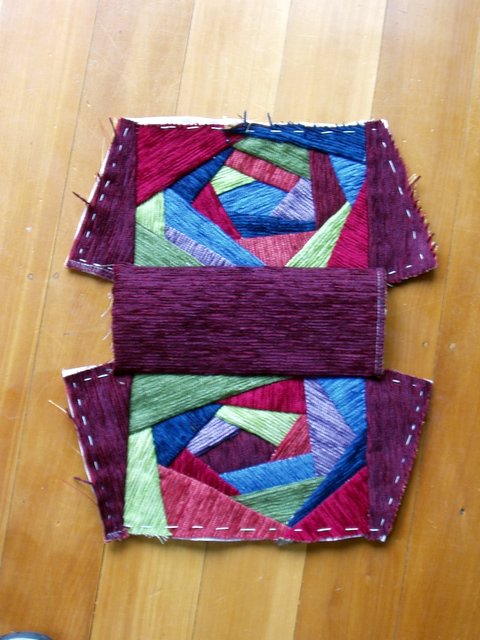
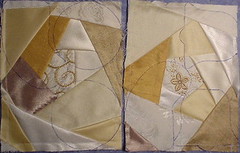
 A couple of weeks back I published a pic of a piece of unembellished CQ with shapes marked in green.
The template I used was for a Christmas bell.
I left the fabric whole while I added embellishment within the template lines.When finished I cut out the shapes leaving a 1/4 inch (roughly) seam allowance.
Once again using the template and similar seam allowance I cut a back for the bells and a stiffener(I used Timtex) slightly smaller than the front and backs.
With the Timtex placed between the fabrics(right sides together) I stitched 3/4 way around on the seam lines;trimmed at the curves and turned the bell right side out and hand stitched the gap closed.
A loop is to be added at the top,and------ding dong,merrily on high!
You can use whatever stiffener you prefer,even card;Or if you prefer plumper bells or hearts lightly stuff.
By the way I must confess to a very senior moment:
Having done so much Redwork lately, I was in a non-thinking mode when I used my water soluble green pen instead of my disappearing purple :-(
More Christmas Ornies
Here are my beginnings :) The shapes are marked out on the naked blocks. Now to embroider and embellish and then to make up into the ornaments.
Thursday, November 10, 2005
Rudolf candy-cane

Made using a small peppermint candy-cane,
2 4mm googly(rolling) eyes
1 6mm red pompom and half of a wavy pipe cleaner.
Great for hanging on branches of xmas tree and for giving the kids something to make and eat!
Bags of Fun
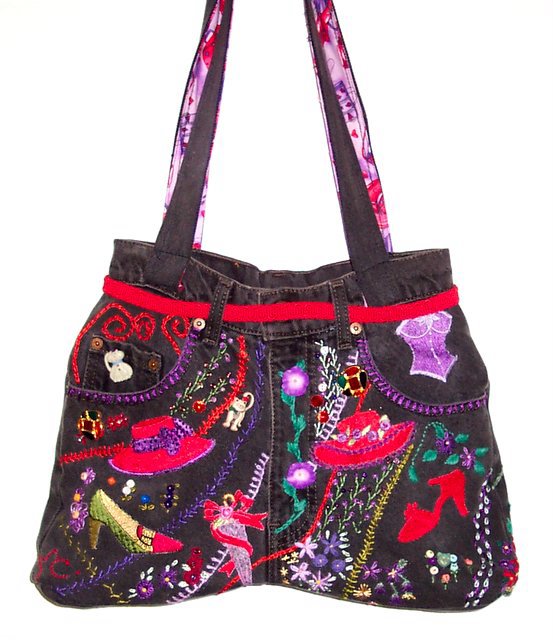
When I started my first BoF I had in mind a confection of soft pastel colours featuring butterflies super imposed on a background of flowers and stems which would comprise embroidery,beads and buttons.
However,somewhere along the way I decided to flaunt my "growing old,disgracefully" tendencies, and with the help of a machine embroiderer friend who constructed the red hats,umbrella and Miss Maude on the back pocket with her magical machine,my tribute to the Red Hat Society took over!
I kept as far as possible,to a red and purple theme and embellished flowers and vines in curves that echoed the pocket shapes on the front.I've used crewel wools,polyster punch needle threads,DMC Madeiras and even DMC stranded cottons.
Being a cat lover,who has at least one cat lurking somewhere in each of my CQ pieces,if you look closely,you'll find three on the front of the bag.
Because I was aware of how the rear of any bag rubs against the body I didn't do much work on the bag's back: Only a feisty lady peering out of one pocket,a red hat on one pocket and a basket on the other.
A few vines and flowers relieve the bareness of the remaining panels.
Some red braid goes through the waistloops and the lining of the bag and straps is a Red hat fabric from a chain-store.
I used a small rectangle of Timtex to stabilise the base of the bag and added a couple of internal pockets in the lining.
I have found it a most convenient bag for general use,and not as heavy as I thought it would be.
I must now complete the "butterflies are free" baga and make 2 others,but,trust me,they wont have as much handwork as this one did!
Hi from a blogging newbie!!
 Well, hi everyone. Maureen invited me to join this blog, and I jumped at the chance. This is all very exciting stuff for me :).
I tell you a bit about myself. My name is Jo, I'm in my early 30's, and I'm a full time mum to three (usually ) gorgeous children, aged 5, 3, and 1, and am happily 'partnered' to Rob.
I have had the desire to crazy quilt for a number of years. My mum is a quilter, and she had books on CQs, and I always found them to be visually appealing. I made some 'sane' quilts in my teens and 20's....and now, I'm finally doing some crazy quilting. I enjoy the creative freedom it gives me, and with three kids, it's reasonable easy to pick up when I've got some spare time (I don't do much housework!) and knock out a bit of piecing, or embellish a seam. I used to crosstitch, and I found I just couldn't achieve anything, I get out my work, thread a needle, do two stitches, then put it all away. So CQ is a fantastic creative outlet for me, because I'm not happy unless I'm creating something.
So that's a brief overview of me.
Maureen posted a link to my Flickr photos a few days ago, so hopefully you've had a look. I'm looking forward to sharing with
you all, and hope you enjoy my work as much as I enjoy yours. Also hoping to participate in a RR of some kind in the new year. Too late for the Xmas ornies for me.
The picture is of my latest bag. It's for my mum, she requested autumn colours. Its made from upholstery samples, then sewn on to a pre-made tote. This one was hard to do, all the piecing had made it really thick to sew through. I also added a pocket to the inside.
Well, thats my first blog post, a monumental occasion - I don't get out much !!- thanks for the opportunity.
Thursday, November 03, 2005
Jo's blocks
http://flickr.com/photos/42008016@NOO/
Jo is a member of the southerncrosscrazies and has just uploaded an album of her CQ work(see link)
http://flickr.com/photos/42008016@N00/
I'd recommend you going and having a look at her work
![]()

