Tuesday, September 27, 2005
 Here's what I added to Mary's block (Joma's daughter). I perfected my frog stitch doing this, as well as wrestling with that age old question - how much is too much !
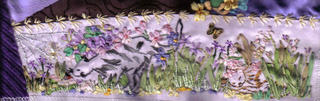
Since Mary loves cats, and the patch was quite large, I decided to do a vignette of two kitties in the garden, one an inquisitive tabby, the other a sleepy ginger, tucked away amongst the grass and flowers.
It's now been posted on to Jam_mam to work her magic.
">Link
Trish's cqrr
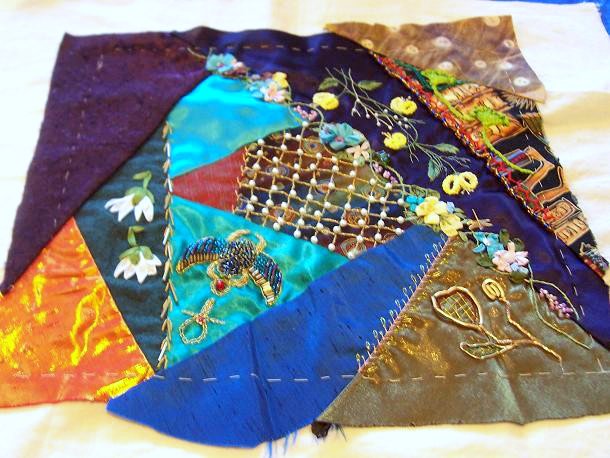
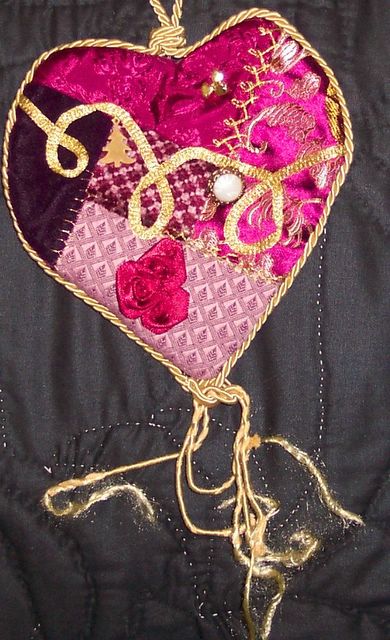
 Trish said she wanted to make her block into a cushion for her bed, so I thought a heart was a nice romantic touch. It's hard to see, but the little gold 'blob' is a cupid.
 ">Link
Christmas Inspiration
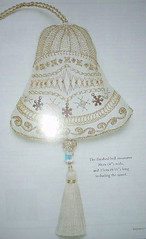
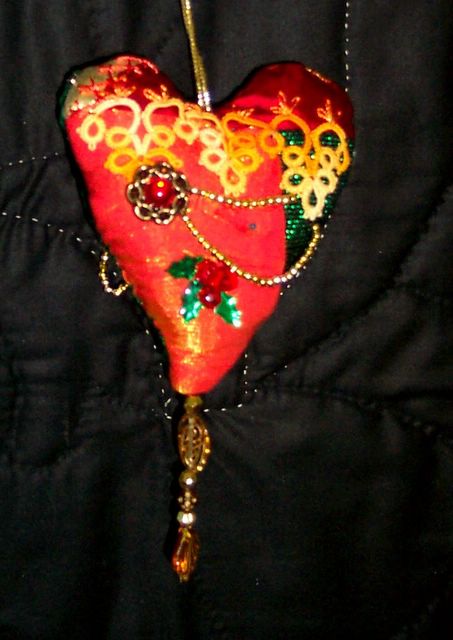
Here's the ornie that provoked me into joining the Ornie swap :) Expect something cream from me - it's in a Aussie mag called 'inspitations'
Wednesday, September 21, 2005
Eyecandy
Thursday, September 15, 2005
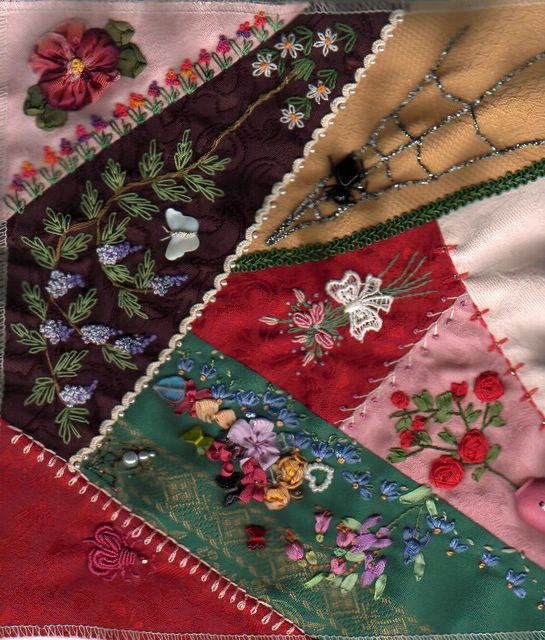
Hope's block general view:something to tantalise Hope whilst she waits for her block to come home!

Posted by Picasa
Posted by Picasa
Tuesday, September 13, 2005
Making the ornaments
Link
My collection of CQ'd Christmas Ornaments varies in shape from the square to circular;hearts,bell-shapes, star, and even triangular.
There's even a cute X-stitched snowman!
First of all I'd suggest making a template in cardboard to the shape you want,then use that template to mark out the shape on your foundation fabric.(Don't forget to leave at least a half inch seam allowance marked on the foundation too)
At this point I'll also add that if you cut your template neatly out of the centre of a square of cardboard,you can use the resulting "window" to place over your block as you're piecing it to see if the end result is pleasing to the eye,without the distraction of jagged fabrics in view)
Decide on the fabrics you're using,and whether you want to add lace or braid along seam lines,and sew them into position as you add the patches.This is much easier than opening fiddly seams later to let the trim into position.
When you've stitched your block,use the template to mark the finished line on the right side and add any beads,charms,buttons or embroidery.
Just remember NOT to take bulk(beads,buttons,etc) too close to the outer seam edge as it creates difficulty in "finishing off".
NOW to complete the ornament:
If you want a "fat Ornie",
Cut a fabric backing to match the front;sew with right sides together most of way around shape;trim with nicks on curves and points so it will turn out easily,lightly stuff and sew the opening closed.
For a FLAT,stiff shape:
I like a layer of Pellon under the main fabric before laying the CQ to a similar shaped piece of stiff card.Lace the seam allowance over the card,or using spray adhesive lightly glue it to card and stitch a backing fabric to cover.
If you want you can add beading,braid,fringing,around the finished shape.
Don't forget to add a loop of ribbon,gold ric-ric,or braid at the top for a hanger!
Monday, September 12, 2005
Christmas Ornies.....piecing your CQ
Link
You are off on a great adventure with crazy patchwork, because there are no
rules...you just go wherever your heart desires!
Piecing a crazy block is different to normal patchwork and piecing...a lot
of newbies do not realise this. You do not cut out pieces and try to seam
them together.
Start with a backing fabric...somewhat larger than the finished size you are
planning on...this can be calico, homespun, anything really as it will not
show later.
If you know what size you want the block to be, draw it on the fabric, then
go over the line with machine stitching so it shows on both sides.
Pull out a bundle of fabrics from your stash that seem to belong together.
You can go for a colour theme, or a colour grouping (like jewels, pastels,
autumn) or whatever your heart desires. Try for a variety of tones and
textures..but do not be too precious about it......this is meant to be fun!
Place your first piece (an irregular shape) flat, face up on your backing
fabric. Many find it easiest to start in the centre, but you can start in a
corner. Place your second piece flat face down, aligning one of your edges
with the edge of the first piece. Sew a 1/4" seam then flip it over, and
press (or fingerpress) the seam. Continue to add pieces using the
sew-and-flip method, trimming as you go.
If you end up with an edge that seems too long, then join two pieces
separately before adding them to break it up.
Sometimes you may work yourself into an awkward spot, and may need to
appliqué some of your edges down. If you like curves, it is easier to
appliqué.
Once you have gone beyond the edges that you defined with a machine
stitching at the beginning, press the piece, turn it over, and using the
original line of stitching as a guide, do another line of stitching to
secure the border of your piece, and keep it firm and flat.
Now you are free to embellish and embroider.
Remember to keep bulky embellishments, like buttons and beads, a good
centimetre away from the edge so you can sew the seam with your machine when
you come to turn your piece into something like a hanging, bag, cushion etc
later.
Just work with colours you like. Try for a balance and harmony. Even if you
are not really happy with your block when you have pieced it, you can
transform it with what you add to it with embroidery etc. e.g. if there is a
bright red piece that stands out like a sore thumb, add things like red
embroidery,braid, red beads/buttons in other parts of the block to balance
it out.
Too much of one colour (e.g blue)makes it look uninteresting ? Add
embellishments in that colour's complement (e.g. orange) to liven it up.
There are many ways of going about it, and loads of books
with good helpful diagrams. And you cannot go past the ones by Judith Baker
Montano for clear instructions and inspiring pictures.You could try your
library first.
But remember, there is no right or wrong...you are the creator here, and
what you make will be totally unique. You can cover up "mistakes" with lace,
button clusters etc. Above all, enjoy "playing."(With thanks to Mary!)
http://forum.craftmagazines.com.au/index.php?...
Tomorrow I'll add more: templates,and instructions for shaping the Ornies!
temURL>
Roz's Heart
As part of the friendship block swap and having been well and truely bitten by the cq bug I made this heart block for Roz. Appologies for those who have already seen it on my blog but I thought I'd share it here too :)

I wasn't sure about the beads (botton right) and if I were doing it again I think I would do something different here.
I wasn't sure about the beads (botton right) and if I were doing it again I think I would do something different here.
Wednesday, September 07, 2005
Measuring about 6 by 6 inches,this is one of my favourites and one of my earliest Christmas swaps received through the "southerncrosscrazies"

Posted by Picasa
Posted by Picasa
Christmas Ornies
A Christmas Ornie collection:some CQ'd xmas Ornies to whet your appetite!

Posted by Picasa
Just a collection of CQ'd Christmas ornaments I have received in swaps over the past few years.As usual,please accept my apologies for less than perfect photgraphy/editing.
There are lots more pics lurking in my files,and when I can find them I'll share some more with you!

Posted by Picasa
Just a collection of CQ'd Christmas ornaments I have received in swaps over the past few years.As usual,please accept my apologies for less than perfect photgraphy/editing.
There are lots more pics lurking in my files,and when I can find them I'll share some more with you!
Christmas heart
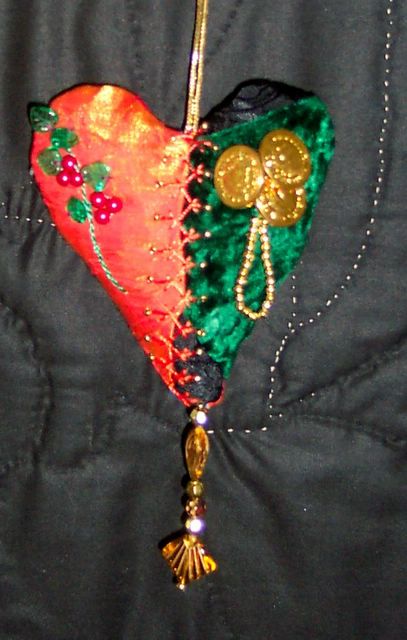
Joma's block after I added bullion stitched red beetle on red patch and flowers & pearl spider on green patch.I also added a twisted basque stitch on the seam between the red and green patches;I leave it to Dianne as to whether she removes the bug and the spider!

Posted by Picasa
Posted by Picasa
miss~nance's block
Here is Gail's block, I added the lavender and the herringbone seam

Tuesday, September 06, 2005
My block arrives home!
Posted by Picasa
My block from the "adventurous ones" of the Craft Forum CQRR arrived home a short while ago,after travelling through Victoria,New South Wales, New Zealand and several parts of south east Queensland.
Thankyou to Diane,LynB;Evie,Helen, and Hope for your input;I'll go and savour it more fully now!
I'm looking forward to see more blocks as they arrive home to their respective owners.
And WHERE are our newbies hiding?? It seems ages since we've seen any of your blocks.
Do you want to email me(or Jacqui) copies and we'll post them for you?
Monday, September 05, 2005
Maureen's Block

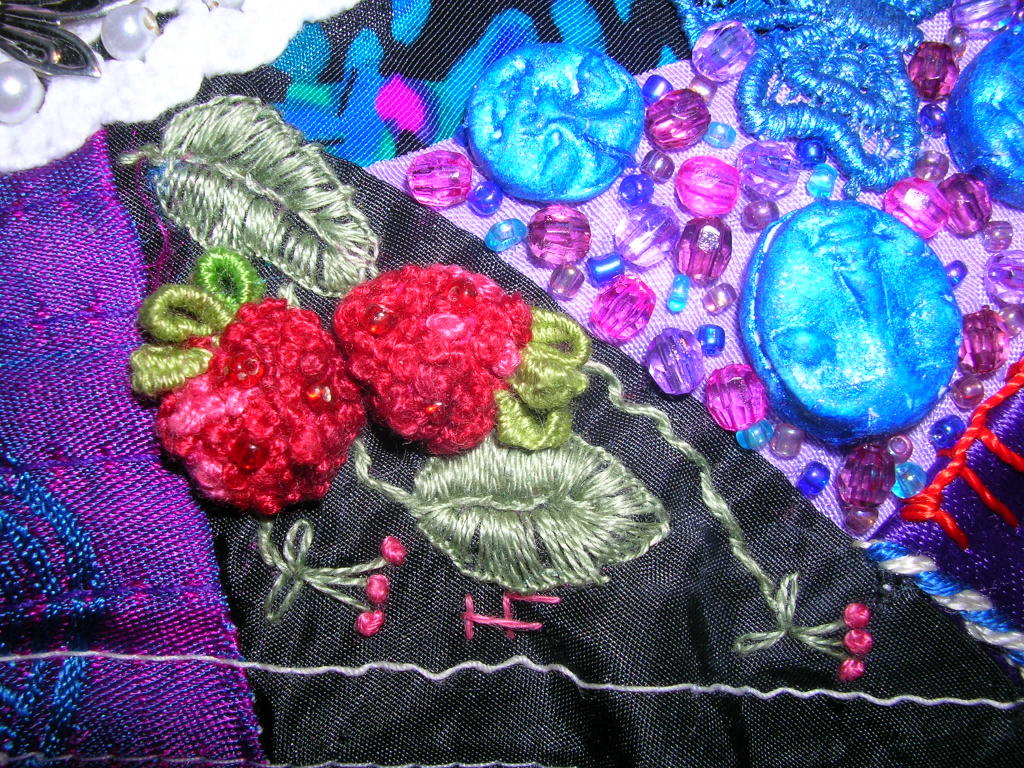
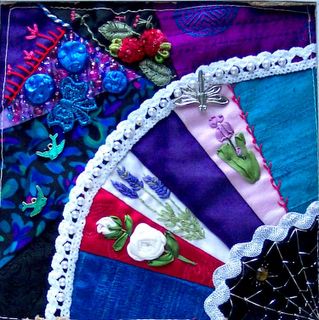
I have just finished work on Maureen's block. I tried to do something different on every block that came my way. So on this last block I decided to try a little "Stumpwork". Something small to start with, I chose one of the free designs, from http://www.windflowerembroidery.com/
and adapted it to fit in the space I had to work with.
The raspberries were embroidered first on fabric, cut, gathered and applied to the block, then embellished with the seed beads and the sepals. The leaves, flowers and stems were worked before applying the fruit.
I am fairly pleased with the results, I hope you like them Maureen.
)
">Link
Friday, September 02, 2005

Bag of Fun?
Starting to plan my bagoffun

Posted by Picasa
I should have explained,that other than two lines of stitching(below the butterfly)I'm still at the playing/planning stage and since posting this pic have unearthed some more likely looking"stuff"
So now,here's the "mad woman's breakfast"

Posted by Picasa
I should have explained,that other than two lines of stitching(below the butterfly)I'm still at the playing/planning stage and since posting this pic have unearthed some more likely looking"stuff"
So now,here's the "mad woman's breakfast"
Thursday, September 01, 2005
Beetles,bugs and all things sequinned!
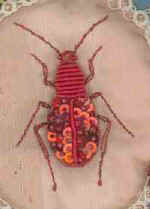
Beaded/sequin Beetle......This is the beetle that started my cries for help!
I "lifted" the beetle pictured from another site,and can't remember where!
I'd like to construct something similar .
Posted by Picasa
I "lifted" the beetle pictured from another site,and can't remember where!
I'd like to construct something similar .

Posted by Picasa
![]()

